Cloth diapering is a popular choice for parents who want a more eco-friendly and cost-effective diapering option. While it might seem daunting at first, making your own cloth diapers can be a rewarding and surprisingly simple process. This guide will walk you through everything you need to know about getting started with DIY cloth diapers.
Benefits of Cloth Diapers
There are many advantages to using cloth diapers. Here are a few:
Environmentally friendly:
Cloth diapers are reusable, which reduces waste compared to disposable diapers.
Cost-effective:
While there’s an initial investment in materials, cloth diapers can save you money in the long run.
Gentler on baby’s skin:
Cloth diapers are often made from breathable fabrics that can be gentler on your baby’s delicate skin.
More customizable:
You can choose from a variety of fabrics, prints, and styles to find cloth diapers that suit your needs.
Before You Sew: Choosing Your Materials
The right materials are essential for creating comfortable and functional cloth diapers. Here’s what you’ll need:
-
Absorbent fabrics: Natural fibers like organic cotton or hemp are popular choices for the inner layer that touches your baby’s skin.
-
Waterproof fabric: A waterproof fabric like PUL (polyurethane laminate) is needed for the outer layer to prevent leaks.
-
Fasteners: Choose fasteners like snaps, Velcro, or hook and loop closures that are easy to use and adjust.
-
Elastic: Elastic helps create a snug fit around your baby’s legs to prevent leaks.
There are pre-cut diaper sewing kits available that can simplify the process if you’re a beginner.
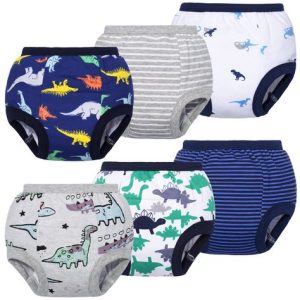
Types of Cloth Diapers (and How to Make Them!)
There are several types of cloth diapers, each with its own advantages. Here are a few popular options with step-by-step instructions:
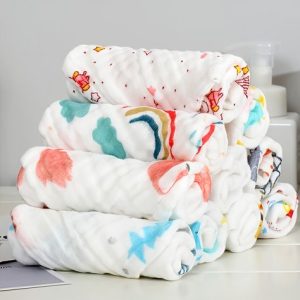
Flat Diapers (Pre-Flats)
Flat diapers are the simplest type of cloth diaper. They are essentially large rectangles of absorbent fabric.
-
Cut fabric: Choose a soft, absorbent fabric like organic cotton or hemp. Cut the fabric into rectangles sized to fit your baby.
-
Serging optional: You can serge the edges to prevent fraying, but it’s not essential.
Flat diapers require folding before use and a separate waterproof cover.
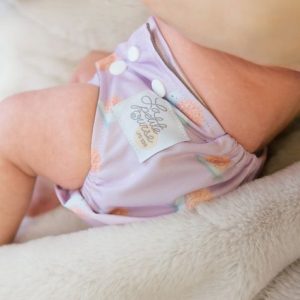
Fitted Diapers
They are like close-fitting covers made from absorbent fabric.
-
Cut fabric: Cut two pieces of absorbent fabric following a fitted diaper pattern.
-
Sew the pieces together: Sew the two pieces of fabric together, leaving openings for leg elastics.
-
Insert elastics: Thread elastic through the leg openings and sew the ends to secure.
It can be used alone or with a waterproof cover for added leak protection.
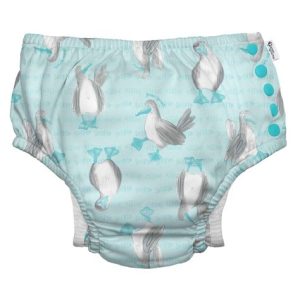
Pocket Diapers
It consist of a waterproof outer shell with a pocket to insert an absorbent liner.
-
Cut outer shell fabric: Cut a piece of waterproof fabric for the outer shell based on a pocket diaper pattern.
-
Cut inner liner fabric: Cut a piece of absorbent fabric larger than the outer shell to create a liner.
-
Assemble the pocket: Sew the sides and bottom of the outer shell, leaving the top open to create a pocket for the liner.
-
Attach leg elastics: Attach elastic to the leg openings of the outer shell.
-
Optional: Add closures: Snaps or Velcro closures can be added to the pocket opening for easy insertion and removal of the liner.
Pocket diapers are a versatile option that offer convenience and easy cleaning.
These are just a few examples. There are many other types of cloth diapers you can explore.
Putting It All Together: Sewing Tips and Tricks
Here are some tips to make your cloth diapering journey smoother:
-
Pre-wash your fabrics: Pre-washing fabrics helps remove shrinkage and ensures a better fit.
-
Use a sharp rotary cutter and cutting mat: Sharp tools will make cleaner cuts and improve sewing accuracy.
-
Start with simple designs: If you’re a beginner, begin with flat diapers or fitted diapers before moving on to more complex designs.
-
Don’t be afraid to customize: Once you’re comfortable with the basics, you can experiment with different fabrics, prints, and closures to personalize your cloth diapers.
-
There are many online resources available: The internet is a wealth of information on cloth diapering and sewing tutorials.
-
Wash your cloth diapers properly: Washing cloth diapers requires a specific routine to ensure cleanliness and prevent leaks. Research proper washing techniques for your chosen materials.
-
Consider pre-made liners: Pre-made liners can be a time-saving option for pocket diapers. These are often disposable or can be washed and reused depending on the material.
-
Join a cloth diapering community: Connecting with other parents who use cloth diapers can be a great source of support, advice, and troubleshooting tips. There are many online forums and communities dedicated to cloth diapering.

Beyond the Basics: Accessories and Options
There are many accessories and options available to enhance your cloth diapering experience. Here are a few to consider:
-
Wet bags: Wet bags are waterproof bags designed to store soiled cloth diapers until laundry time.
-
Diaper sprayers: Diaper sprayers attach to your toilet and make rinsing soiled diapers before washing more convenient and sanitary.
-
Cloth diaper liners: Cloth diaper liners made from fleece or other materials can help catch solid waste and make cleanup easier.
-
Boosters: Boosters are additional absorbent inserts that can be added to diapers for increased absorbency during nighttime or heavy wetting periods.
Care and Maintenance: Keeping Your Cloth Diapers Clean
Proper washing is essential for maintaining clean and functional cloth diapers. Here’s a general guideline:
-
Solid waste disposal: Most cloth diaper covers have a pocket to insert an absorbent liner. These liners often catch solid waste, which can be disposed of in the toilet.
-
Pre-rinse: Many parents recommend rinsing soiled diapers with a diaper sprayer to remove excess waste before laundering.
-
Washing routine: Check the care instructions for your specific fabrics. Generally, cloth diapers can be washed with mild detergent on a cold or warm cycle. Avoid harsh chemicals, bleach, and fabric softeners, which can damage the fabric and reduce absorbency.
-
Drying: Line drying diapers in the sun is the most natural and eco-friendly option. However, tumble drying on low heat can also be used. Avoid high heat settings, which can damage elastics and waterproof layers.
By following a consistent washing routine, you can ensure your cloth diapers stay clean, hygienic, and last for years.
Conclusion: The Rewarding World of Cloth Diapers
Making your own cloth diapers can be a fun and rewarding experience. It allows you to customize diapers to fit your baby’s needs and preferences, while also saving money and reducing your environmental impact. With a little planning and effort, you can create a comfortable and sustainable diapering solution for your little one.
Remember, there is no right or wrong way to cloth diaper. The most important thing is to find a system that works for you and your baby.